
easy.jobs lets you manage and update customize fields for each published job. This way, you have full control over which required fields your candidates will have to fill up to successfully apply for the job. Follow this guide to learn how to update the custom fields in easy.jobs.
How To Configure Custom Apply Field From Dashboard? #
You can easily configure custom apply fields both from easy.jobs app your WordPress dashboard. Follow the below simple guidelines and add custom fields effortlessly.
Step 1: Go To Custom Apply Field #
With custom apply fields you can allow candidates to add additional information, or attach any files as needed. To do so, navigate to Settings → Candidate Apply Settings → Custom Apply Fields.
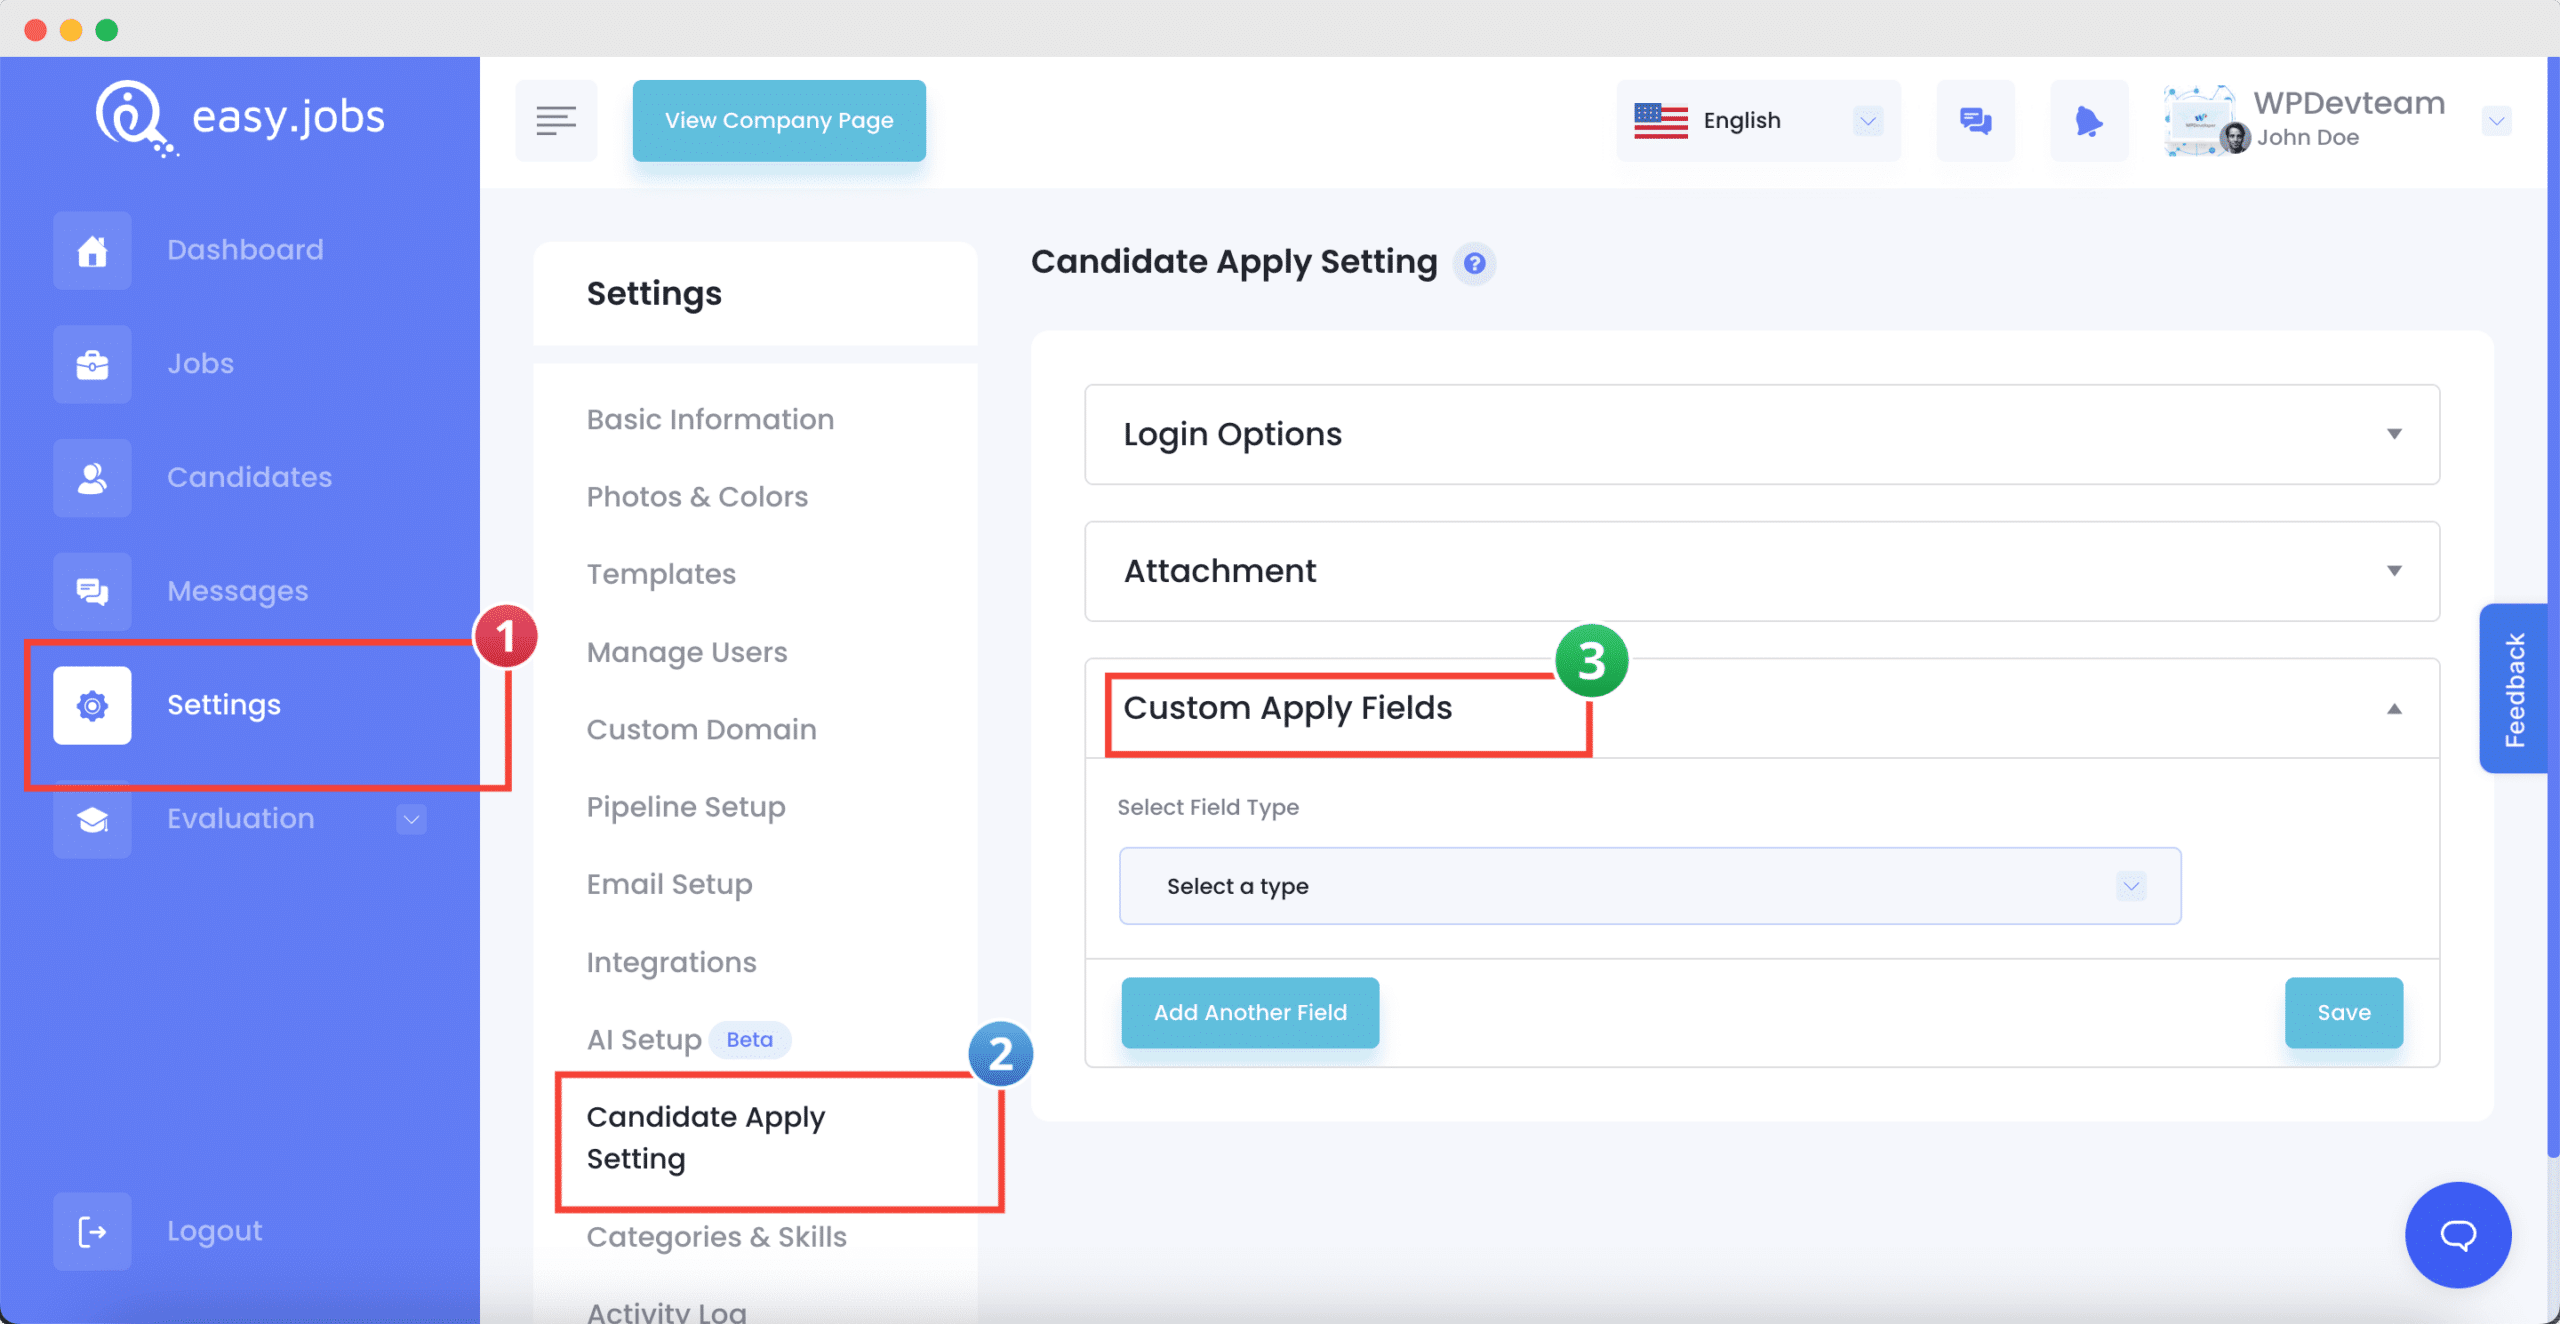
Step 2: Add Custom Field #
Under the ‘Custom Apply Field’ section add any field that you want by clicking on ‘Add Another Field’. Now, Select Field Type, Attach Field Title, & click on ‘Save Changes’.

How To Update Customize Fields In Job Posts? #
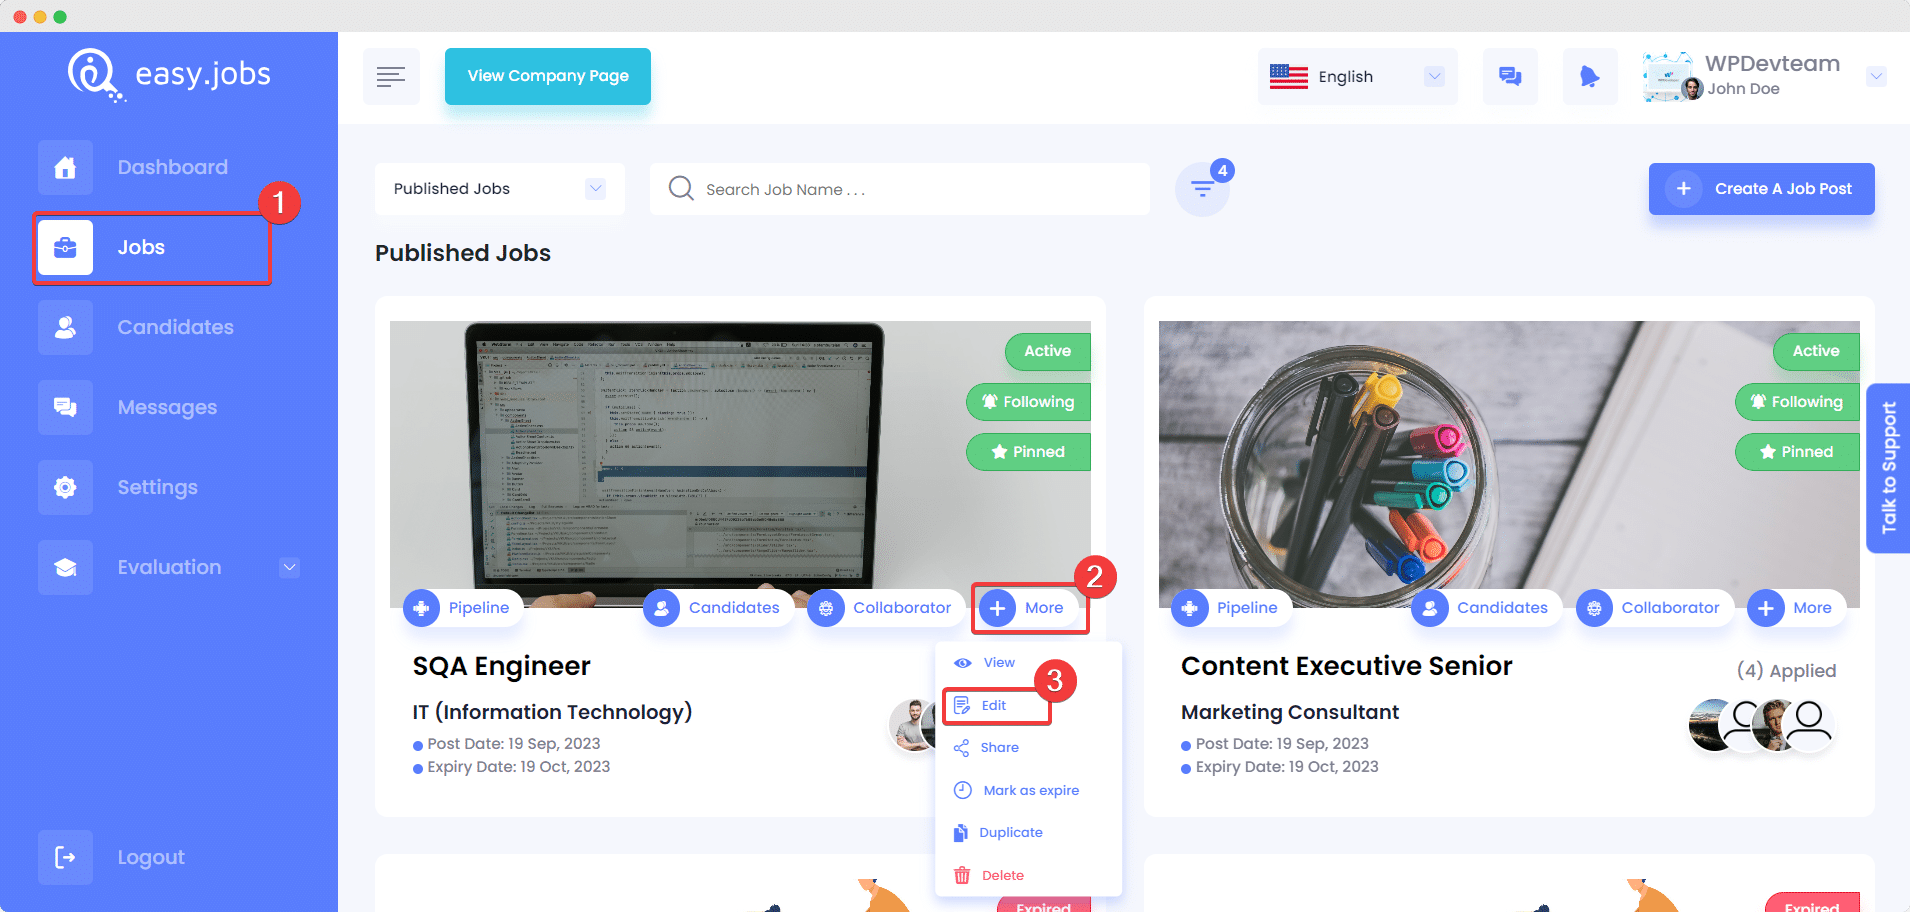
You can create custom job fields when you create a job post in easy.jobs, or you can update customize fields for published jobs from your dashboard. To do this, click on the ‘Jobs’ tab from your dashboard, head over to the job you want to modify, and click on the ‘More’ button. From the drop-down menu, select the ‘Edit’ option
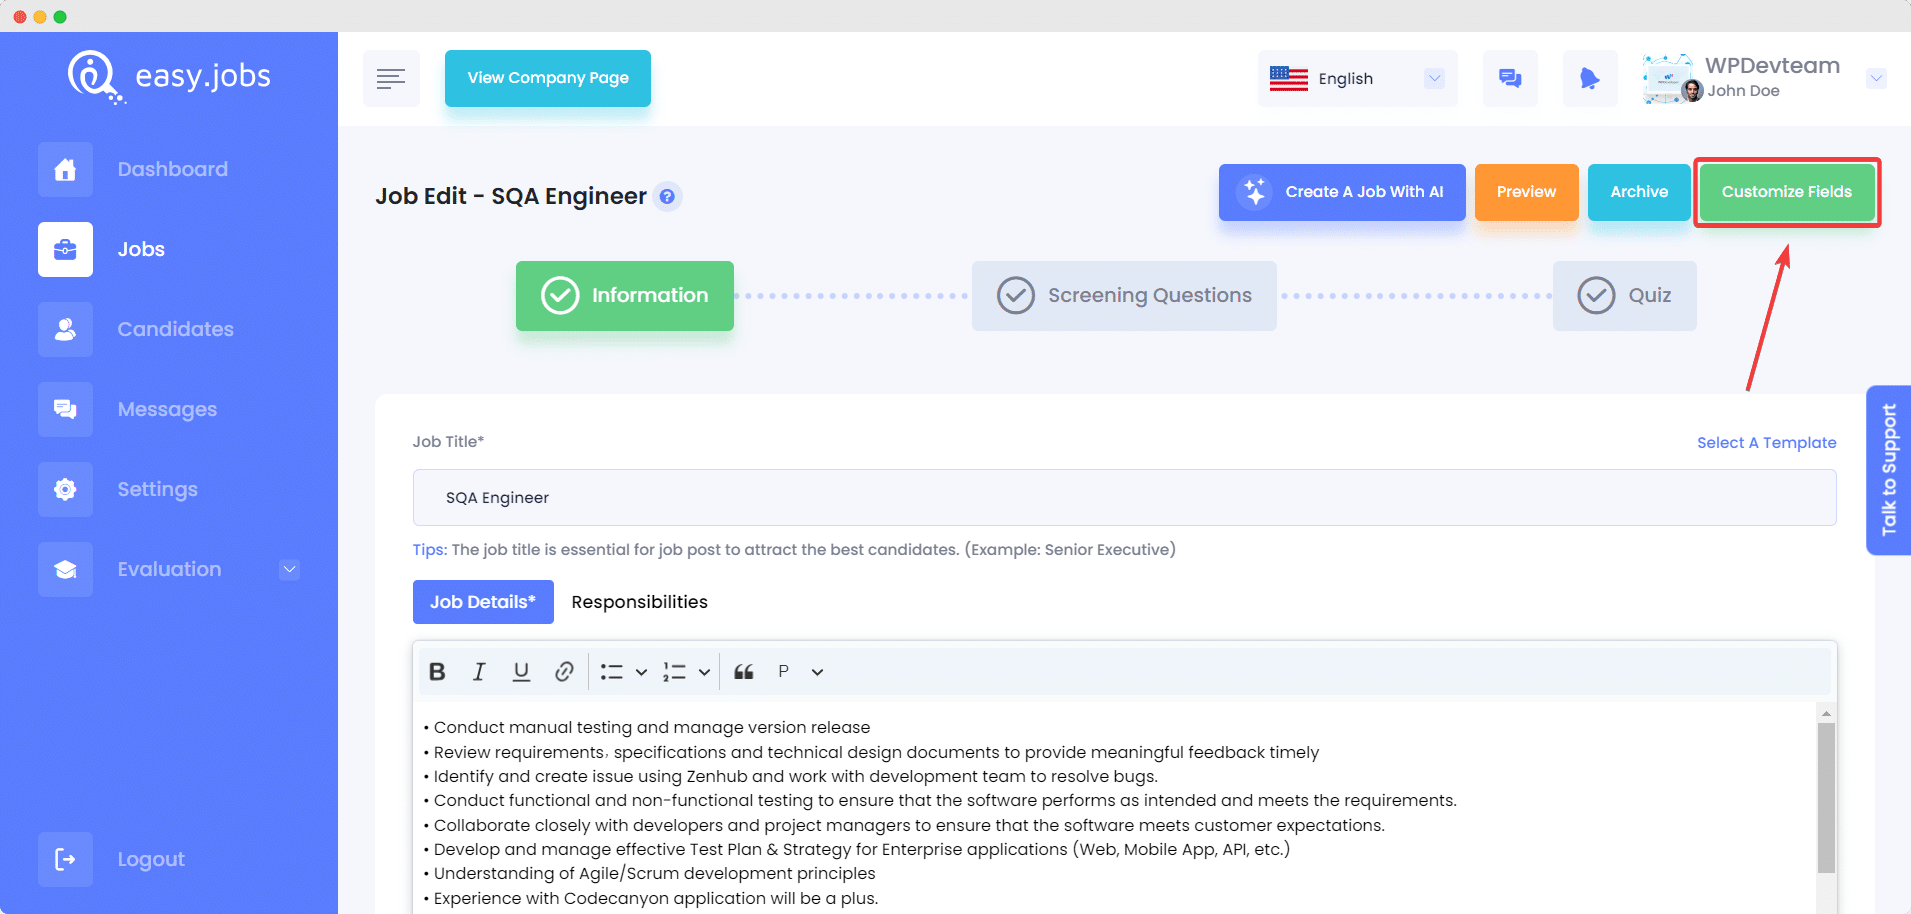
Step 1: Customize Fields For Your Job #
It will take you to this page from where you will see the ‘Customize Fields’ button at the right top corner of the page. Click on the button to update fields for your job.
Step 2: Choose Custom Fields & Save #
A popup window will appear containing several different options for choosing custom fields with buttons. When you toggle to ‘Show‘ the fields, you will also have the option to make them ‘Required‘ for the candidates who are applying. However, the ‘First Name‘ and ‘Last Name‘ fields are shown and required by default. Select the fields that you will need for your hiring process with the one-click buttons. When you are done selecting the required fields, make sure to click on the ‘Save & Continue’ button.

If you have followed all the steps, congratulations! You have successfully updated the custom fields in easy.jobs.
If you need any help, feel free to contact us or join our Facebook Community to get connected with us.