If you integrate Zapier with easy.jobs, it will allow you to create automated workflows by connecting different apps and services. By connecting easy.jobs with other tools you use (like Gmail, Slack, Google Sheets, etc.), you can automate tasks like sending email notifications when a new application is received, updating applicant data across multiple platforms, or notifying your team about a new candidate.
Follow the step-by-step guide below to learn how to integrate Zapier with easy.jobs.
How to Configure Zapier with easy.jobs? #
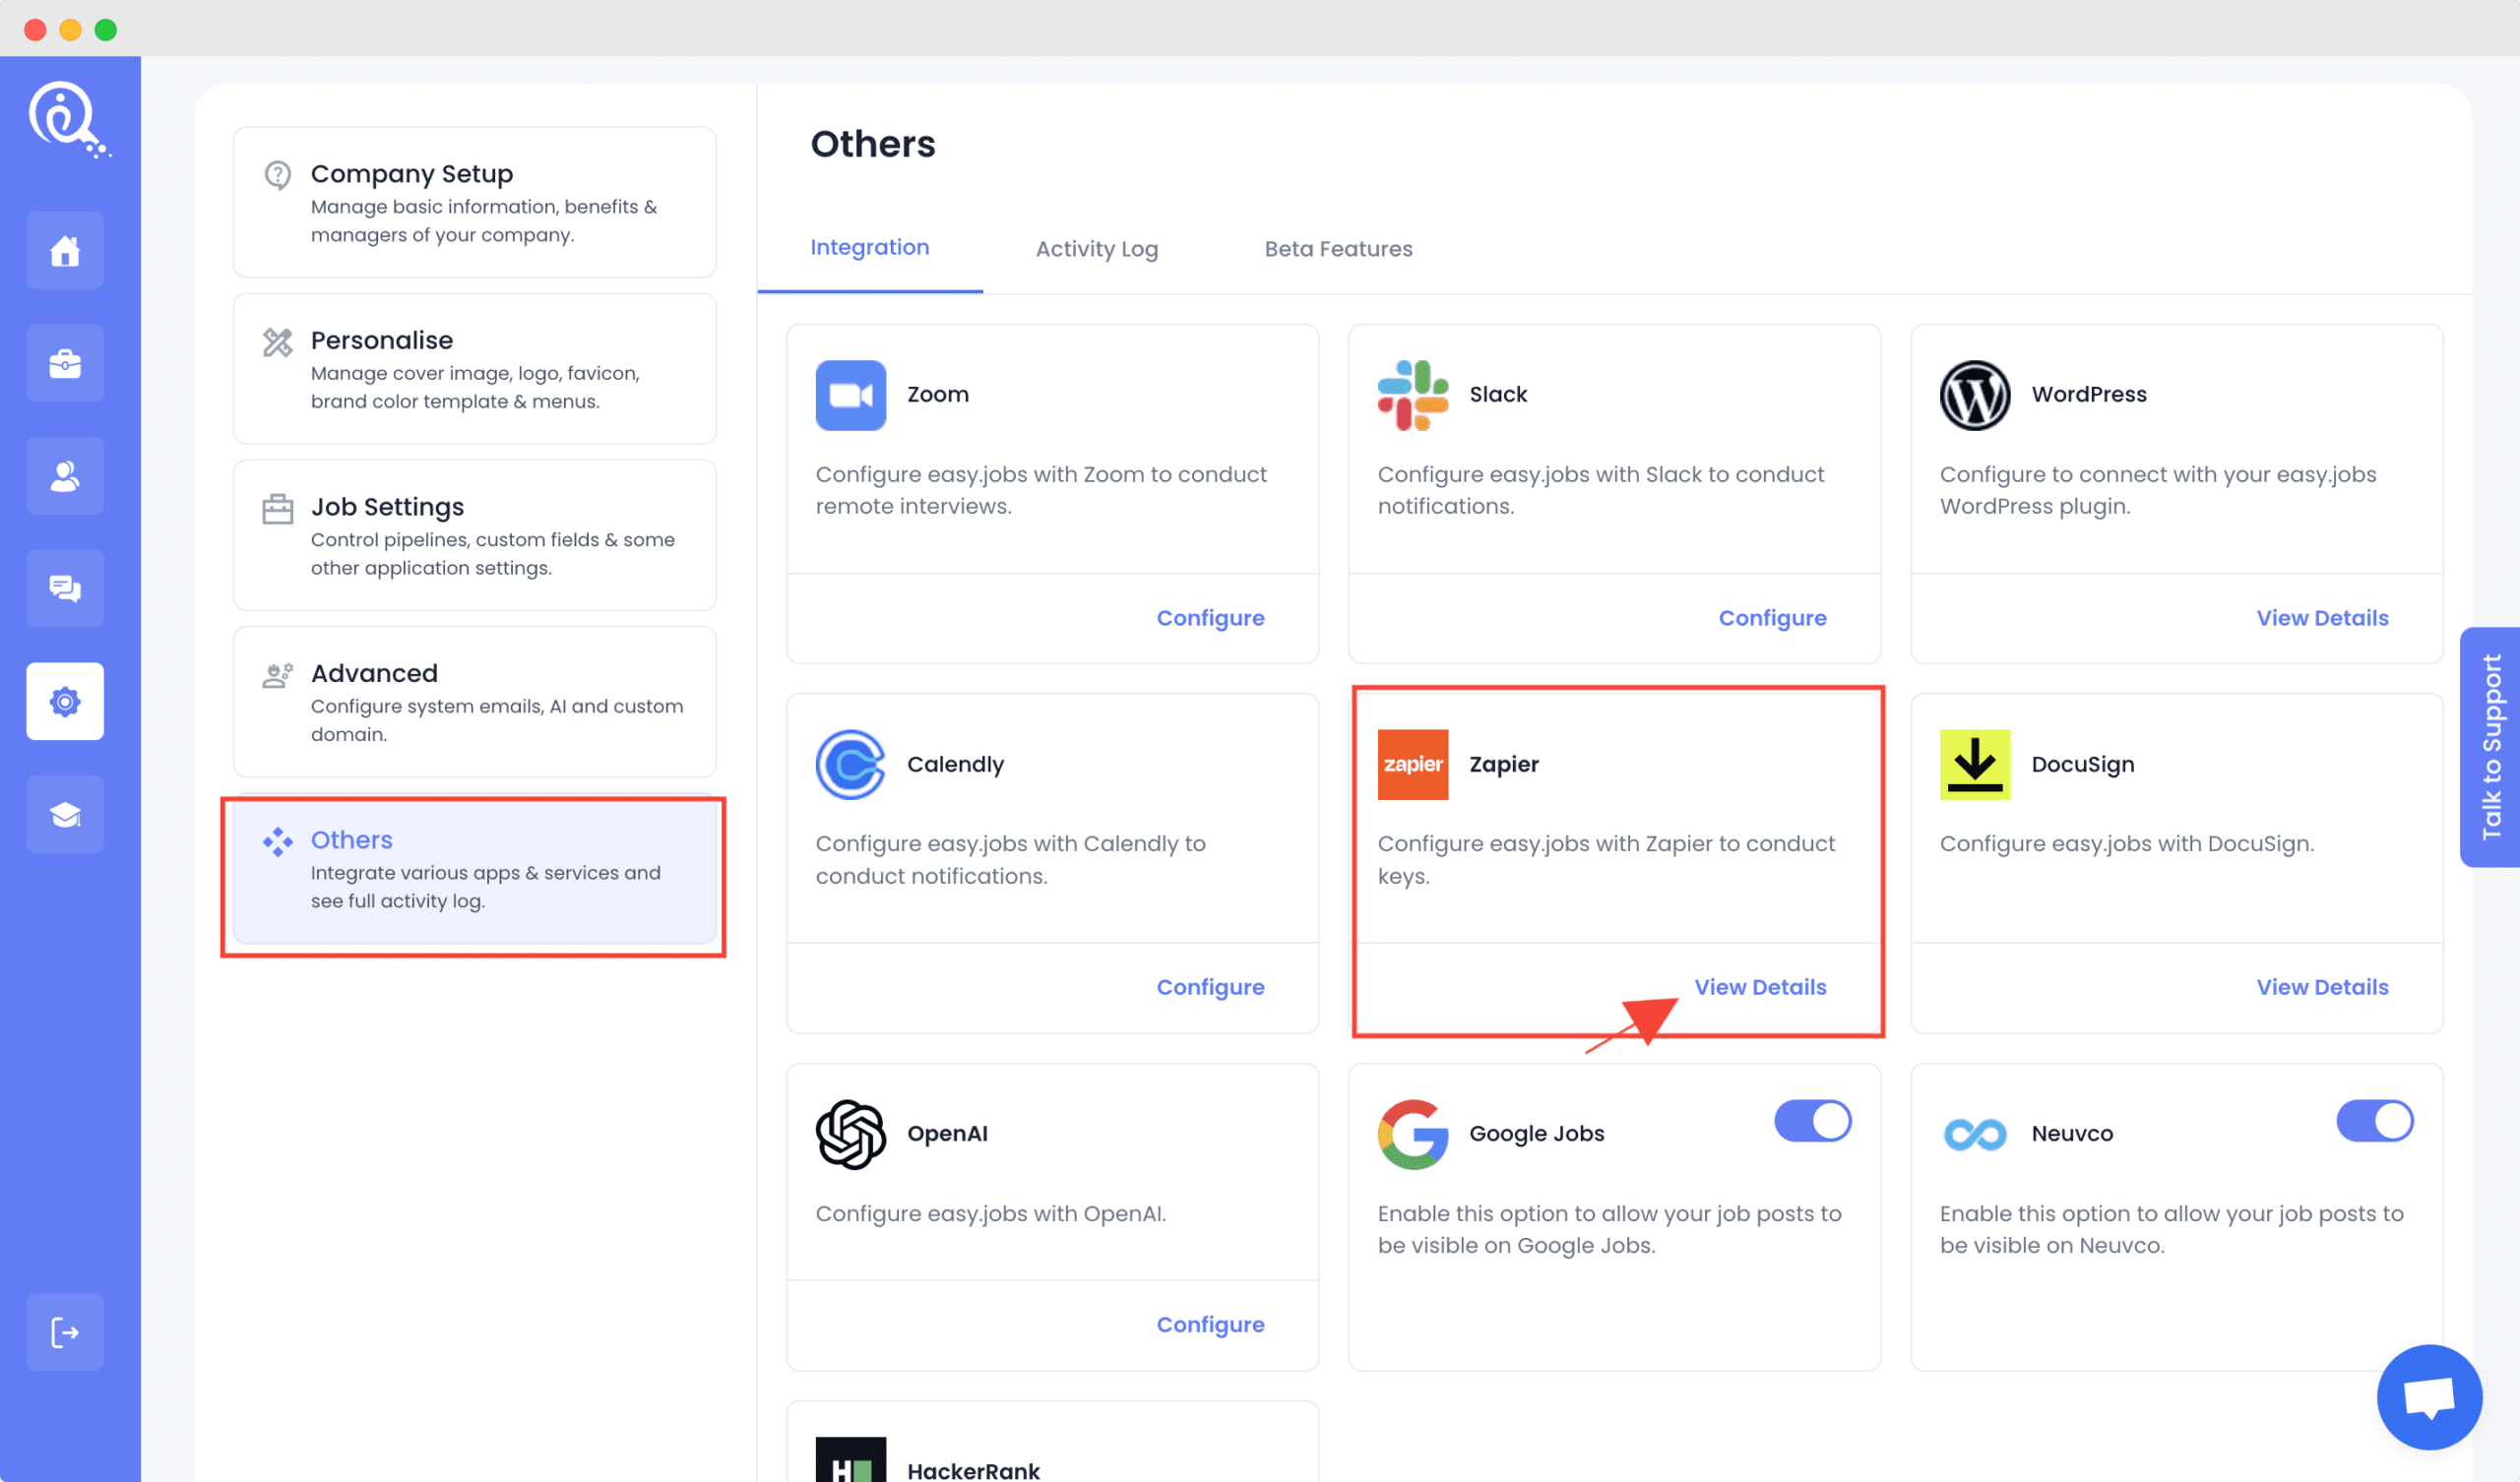
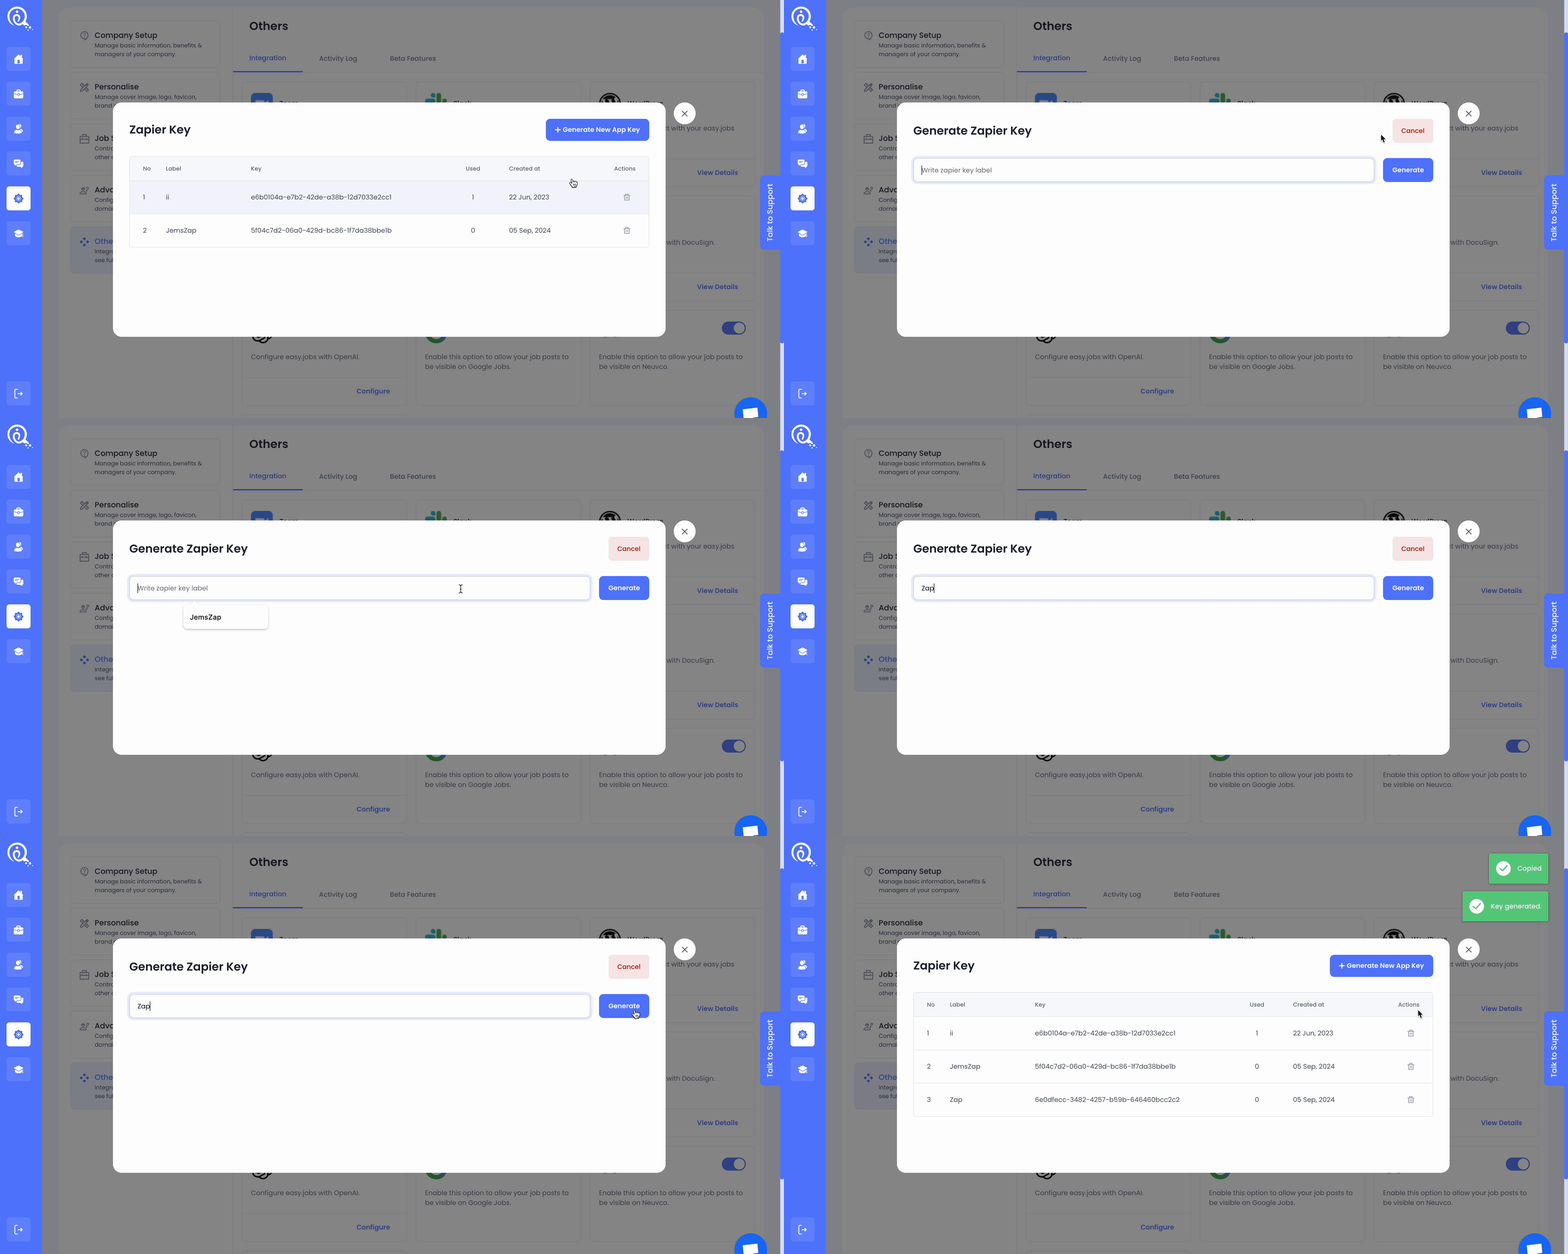
To configure Zapier with easy.jobs, log in to your easy.jobs dashboard first. Go to ‘Settings’ → ‘Others’. You will see all the available integrations for easy.jobs here. Now, click on the ‘View Details’ button under ‘Zapier’. If you do not have any Zapier Key already created then click on the ‘Configure’ button appearing in the Zapier section.

Now click on the ‘+Generate New App Key’ button. Add a proper Zapier Key Label for the Zapier key and click on the ‘Generate’ button.

How to Integrate Zapier with Your easy.jobs Account? #
You need to have a Zapier account already created to integrate it with easy.jobs. Follow the steps to integrate Zapier with easy.jobs and automate your tasks.
Step 1: Create A New Zap #
First, login to your Zapier account. From the dashboard, click on the ‘Create Zap’ button. You will see a new popup appearing on the screen to create the Trigger. Give a proper Title to the Zap first.

Step 2: Set Up The Trigger #
You will see a search bar appearing along with a popup. Now, search easy.jobs in the search bar of the trigger popup and click on it.

Now, select the event that you want to create a trigger for. We have selected ‘New Candidate Applied’ here for creating the trigger. Click on ‘Continue’.

Step 3: Connect Your easy.jobs Account #
Now, connect your easy.jobs account. For that, click on ‘Sign In’. Now, you will be asked to place the API key you generated at the beginning. Paste the API key and hit the ‘Yes Continue To easy.jobs’ button. Your easy.jobs account will be connected in just a few seconds.

Step 4: Choose The Action Platform #
After the 3rd step, click on the ‘Continue’ button and move to the next stage ‘Action’. Under the Action popup, search the platform where you want to trigger the action. Here, we have selected Google Sheets.

Next, choose the Event for that platform. We have selected ‘Create Spreadsheet Row’ as the event. On choosing this, a new row will be created in the selected spreadsheet whenever a new candidate applies.

Step 5: Connect Your Email Account #
Now, you need to sign in to the account for Zapier access. Click on ‘Sign In’ and provide the email credentials to log in. Move to the ‘Next’ step and allow Zapier to access your Google Account. Click on the ‘Continue’ button.

Once done, add your Drive Value. Choose the Spreadsheet and Worksheet where you want to trigger the action. Add Dynamic Fields, such as Candidate Name, Candidate ID, Email Address, Phone Number, etc, and Click ‘Continue’ for the next step.

Click on the ‘Test Action’ or ‘Retest Action’ Button. Now, go to the Google Sheet you selected. You will see the Data entered on your selected Google Sheet.

Your easy.jobs account is now properly connected to Zapier. Whenever a new candidate applies to a particular job post, the required information will be added to the spreadsheet automatically.
Thus, following the quick steps you can easily integrate Zapier with easy.jobs. Getting stuck? Feel free to contact our support team for further assistance.


